
Crochet Diamond Mesh: a simple stitch for beginners
- Alyssa

- Apr 22
- 4 min read

Jump to:
So, you've bought a crochet hook and some yarn, and you've learnt the basics. But now what? When you're new to crochet, choosing what to make can be pretty difficult. Do you just go ahead and try to make a jumper? Or maybe something smaller, like a coaster or a bookmark?
Well, when I was a beginner, I actually learnt how to crochet a few different stitches before I made anything! And crochet mesh was one of them! Crochet mesh is great for beginners, as it uses 3 basic stitches: chains, single crochets, and double crochets. Lots of beginner patterns I've seen use the mesh stitch, so I think it's a great one to know!

What Yarn Should I Use?
If you're a newbie, make sure your yarn isn't too thin. A DK (double knit) or worsted weight yarn will work. Once you have a hang of this stitch, you can switch to using a thinner yarn. You can create really gorgeous things for the summer by using a thin cotton yarn!
What Hook Should I Use?
If you're using a DK or worsted weight yarn, anything from a 4mm to 5.5mm hook will work! You can also check the label on your yarn - it will have a recommended hook size. Again, once you have a hang of this stitch, you can experiment! You can size up your hook by 1-1.5mm to create very loose stitches, or you could size down to create a stiffer, tighter piece of crochet.
What You'll Need:
a yarn of your choice (see notes above)
a hook of your choice (see notes above)
a pair of scissors
a darning needle
Stitch Abbreviations:
ch(s): chain(s)
sc: single crochet
dc: double crochet
Pattern Notes:
This pattern is worked in US crochet terms, not UK. If you are unsure about the difference between these two terms, check out my blog post here, where I explain it in detail.
Any information inside the brackets {} is to be repeated.
The chain 1 at the beginning of every other row does not count as a stitch.
This pattern is worked in rows. Make sure you turn your work at the end of each row.
Crochet Mesh Stitch Pattern:
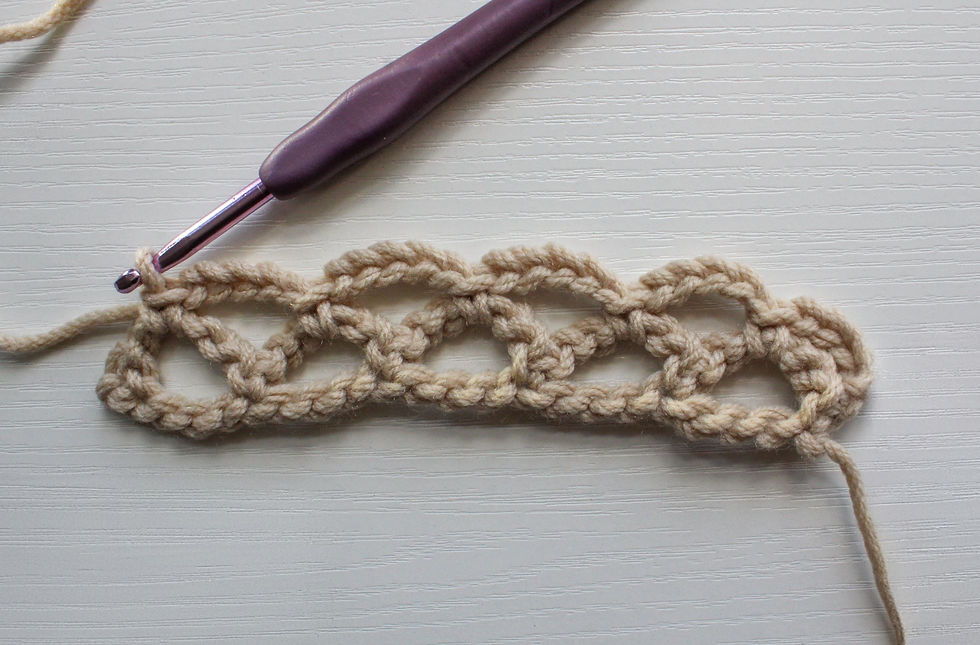
Row 1:
Make a slip knot, and ch any multiple of 4 plus 2 extra chs. For my sample, I've ch 22.
Sc into the 2nd ch from your hook.
{ch 5, skip 3 chs, sc into the 4th ch}. This has created your first mesh stitch. Repeat down the ch. You should make your last sc into the last ch.

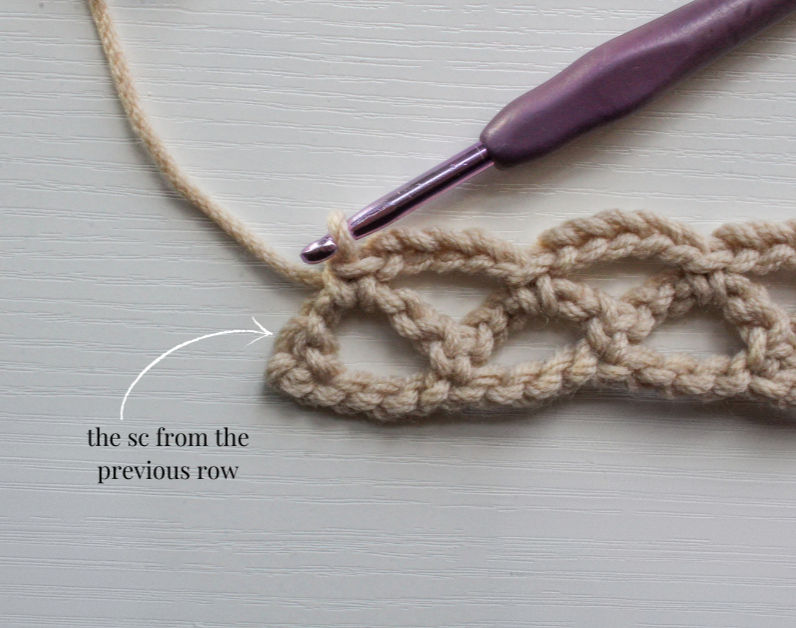
Row 2:
Ch 5 and turn your work.
Make 1sc into the 1st ch-5 space (I like to call these the "big" spaces).

{ch 5, 1sc into the next ch-5 space}. Repeat down the row, working into each space. You should finish with a sc.
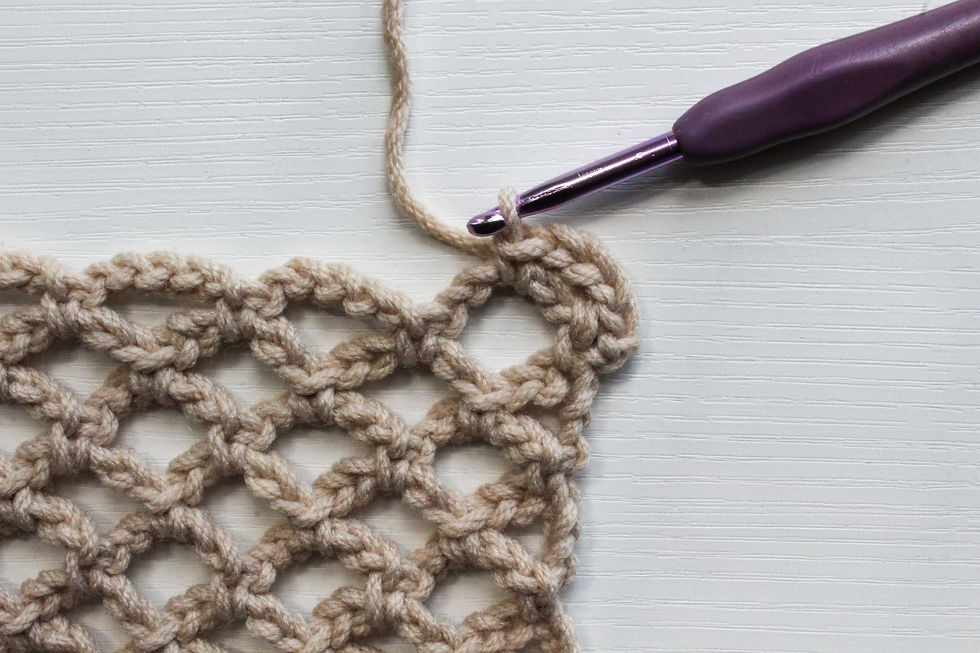
When you reach the end of the row, ch 2 and make 1dc into the sc from the previous row. This will mean that the edge will be nice and neat!
Row 3:
Ch 1 and turn your work.
Begin by making 1sc into the 1st stitch (the dc from the previous row).
Ch 5, and make 1sc into the 1st ch-5 space (this is not the very first space, it's actually the next one!).
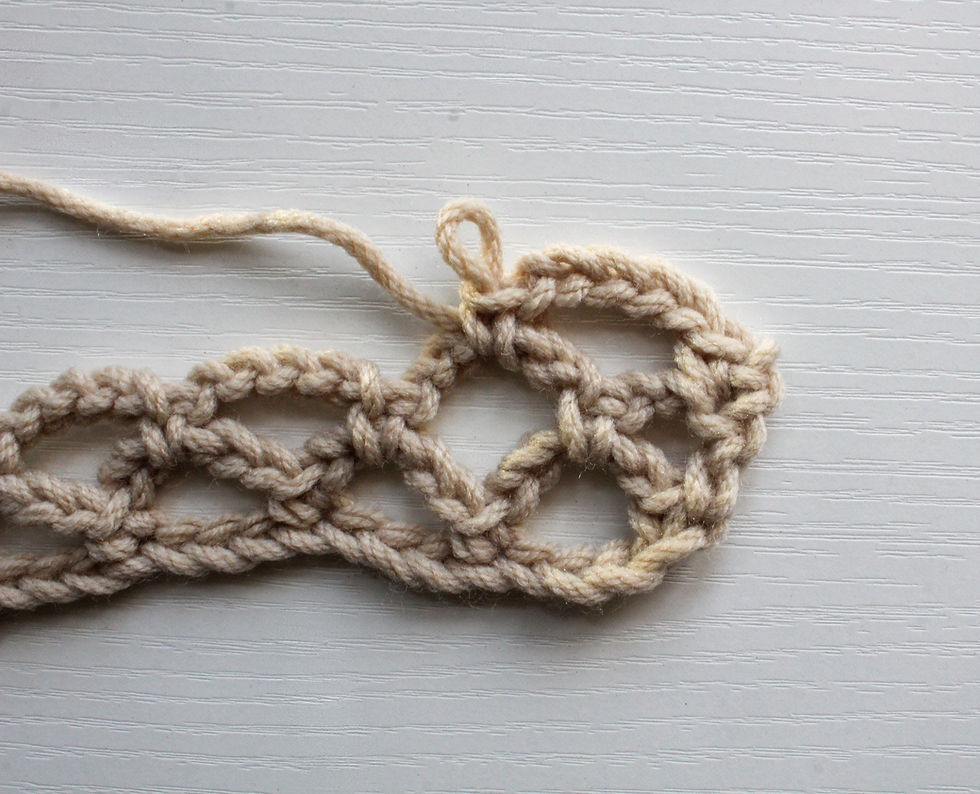
{ch 5, 1sc into the next ch-5 space} repeat down the row until you have 1 ch-5 space remaining (you should finish with a sc).
Ch 5 and make 1sc into the 3rd ch (not the gap). This will create a straight edge.


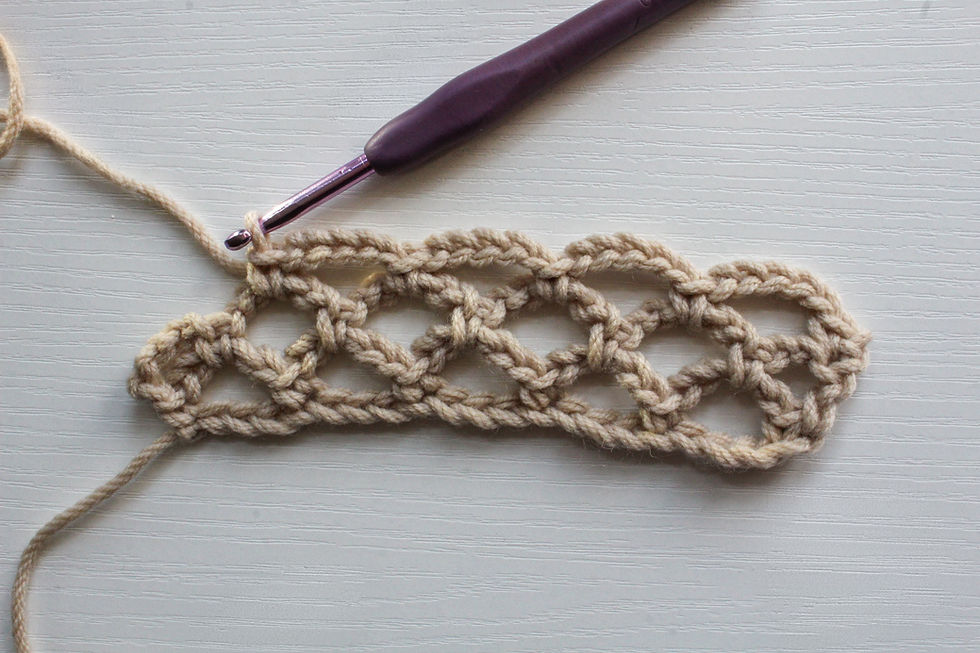
Rows 4 & Onwards:
From here, you are simply going to alternate between rows 2 and 3. You can crochet as many rows as you would like!
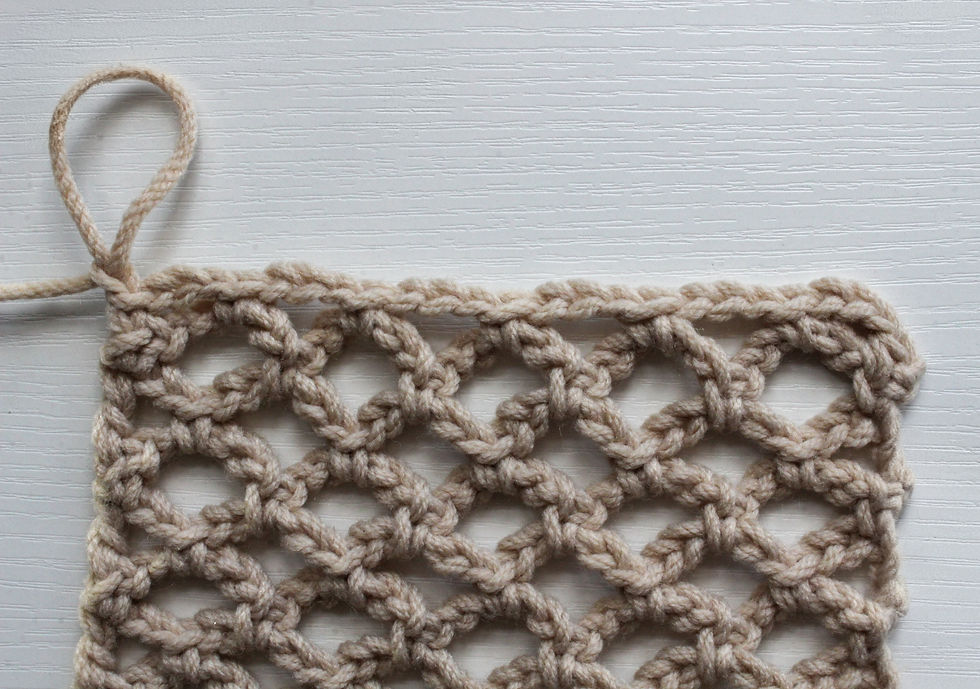
Finishing off the Stitch:
Once you have crocheted your desired number of rows, ch 1 and turn your work.
Into the 1st stitch, make 1sc.
Ch 3, and make 1sc into the 1st ch-5 space.
{ch 3, make 1sc into the next ch-5 space} repeat down the row until you have worked into every ch-5 space. You should finish with a sc.
At the end, ch 3 and make 1sc into the last stitch.
From here, ch 1 to fasten off, cut your yarn, and sew in any remaining tail ends.
And there you are! You now know how to crochet the diamond mesh stitch! If you liked this super quick pattern and tutorial, make sure you subscribe to our monthly newsletter so that you never miss out on a new, free crochet pattern, and don't forget to drop a comment below if you have any questions!
And if you create anything using one of my patterns and share it online, I'd love to see it! Make sure you tag us!


Comments