
Crochet A Granny Square Tote Bag (that doesn't need a lining!)
- Alyssa

- Jun 8, 2025
- 4 min read
Updated: Jun 16, 2025

I actually decided to design this pattern for a granny square tote bag because of a lovely request I received on one of my YouTube tutorials. Needless to say, I have loved making this tote bag because I adore granny squares. I will most certainly be designing and sharing the patterns for more granny square bags, so if this is something you are interested in, make sure you keep an eye out!
One of the things that I love about this bag is that it does not need a lining! Of course, if you would like to line it, that is easily done, but you don't have to! There aren't any special stitches involved...just the basic single, half double and double! So, even if you haven't much experience with crochet, you can still make this bag!
So, without further ado, let's get started!
You Will Need:
4mm and 3.5mm crochet hook
DK yarn of your choice. I have used 3 colours. However, this is where creativity comes into play! You can use as few or as many colours as you please! scissors
darning needle
stitch markers
tape measure (optional)
Abbreviations:
sc: single crochet
hdc: half double crochet
dc: double crochet
sl st: slip stitch
Gauge:
Granny squares of 15 rounds measures 11 inches (28cm) across.
Notes:
This pattern is written in US crochet terms, not UK. If you are unsure about the difference, check out my blog post here, where I explain the difference in detail.
Any chain 3 that is made does count as a stitch.
Do not turn your work, unless stated.
Pull any slip knots tight to help close any gaps and make your work look neater.
How is this Bag Made?
We will start by making 2 granny squares, each with a sc border. From here, we will work the sides and base (the gusset) on each of the squares. Then, we will attach the squares together. And finally, we will make the strap!
Method:
The Granny Squares:
The first step is to make 2 granny squares, using your 4mm crochet hook. If you are unsure how to make a granny square, check out this post here where I show you how to in detail (and with a video tutorial). Each square should be 15 rounds in total.
Once you have completed your rounds, do not cut your yarn and fasten off. We are now going to make a simple border.
Creating the Border:
Chain 1.
Starting in the same stitch, make 1sc.
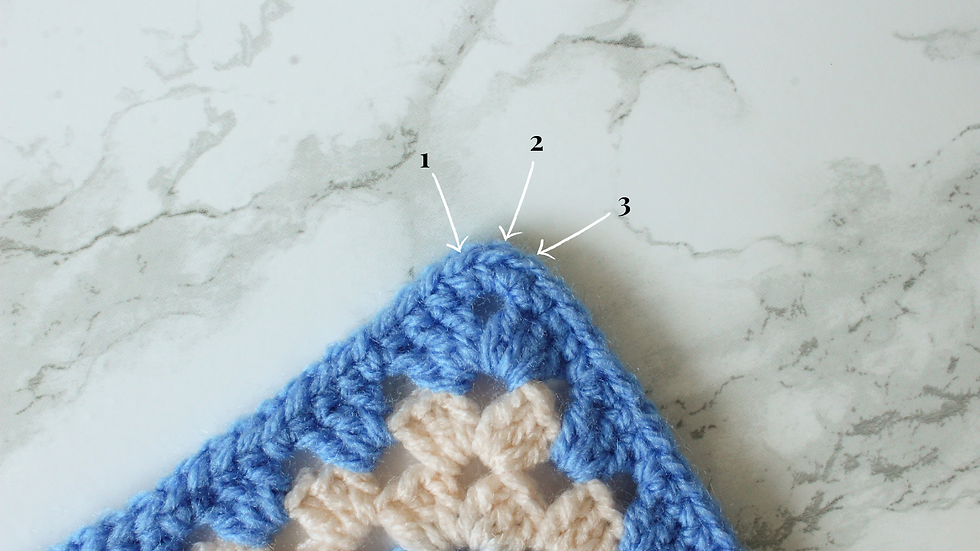
Working along the side, make 1sc into each stitch. When you reach the chain 1 spaces, make your sc into it.
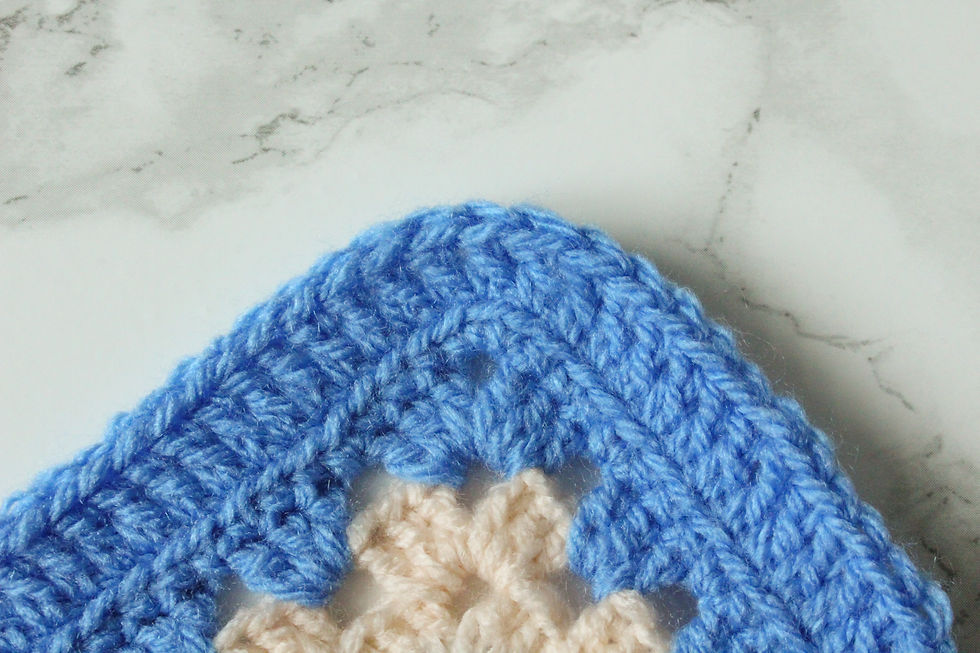
When you reach the chain 3 space at each corner, make 3sc into it.
Continue along each side and each corner. At the end, sl st into the 1st sc to close the round.
Now, fasten off, cut your yarn, and sew in any ends.
Repeat the above step with your other square. Both squares should now have a sc border.


Making the Gusset:
Take 1 of your granny squares. At the top left corner, find your 3sc that we made into the corner space. Mark the 2nd of these sc with a stitch marker. Repeat this with the opposite corner. You should now have two markers on your granny square.


Attach your yarn where your first stitch marker is. Then, chain 3 (this counts as your first double crochet).

Working in the back loop only, make 1dc into every single stitch around 3 sides of your square. You should finish at your second stitch marker.
(Tip: I like to work under both loops of my very last stitch. This just adds a little bit of security to the join).


At the end, fasten off, cut your yarn and weave in any ends.
Now, repeat the above steps on your second square. Both should now have a gusset (a dc edging) along 3 of the sides.

Joining your Squares:
You can, of course, use any method to join your squares. I am using the slip stitch method.
Take your squares and place them wrong sides together (the right sides should be facing out).
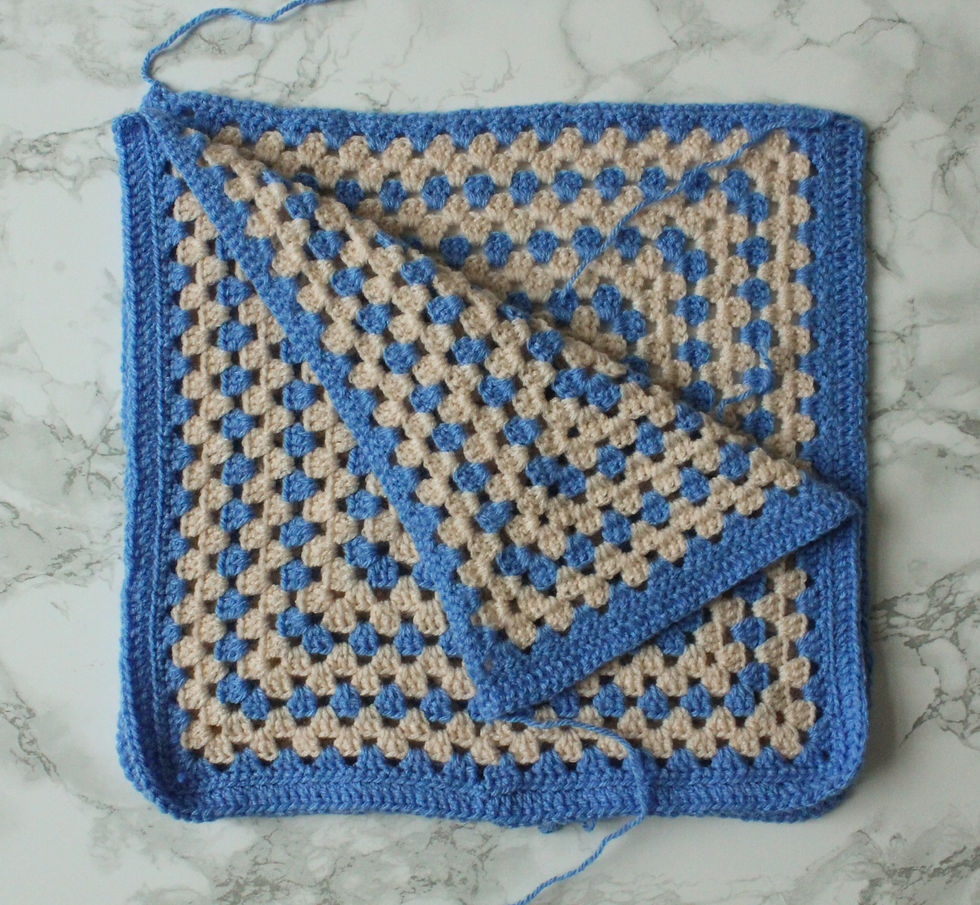
Line up your edging. Insert your hook into the 1st stitch of each square, and attach your yarn
Working into both squares, make a slip stitch into each stitch, working around the 3 sides that has the extra dc edging (gusset). At the end, fasten off, cut your yarn and weave in any ends.
Making the Staps:
Now, this is only a guideline. You can make your strap as wide/thin/long/short as you would like!
Row 1:
On one side of your bag and, using your stitch makers, mark where you want your strap to be. I like mine to be in line and as wide and the gusset.
Repeat this one the other side of your bag.
Starting on one side and using your 3.5mm crochet hook, insert your hook into where one of your stitch markers is and attach your yarn.
Now, make as many hdc as you would like until you reach the 2nd stitch marker. I am making 8hdc.
Now, chain 1 (this does not count as a stitch) and turn your work.
Row 2-110:
Make 1hdc into each stitch along. At the end, chain 1 and turn your work. (8hdc in total).
Joining:
Once your strap has reached its desired length, fasten off and cut your yarn, leaving a long tail end (for sewing).
Thread your darning needle with this tail end.
Line the end of your strap up with the stitch makers on the other side of you bag. Now, using your darning needle, sew it firmly to your bag.

And, to finish, weave in any loose ends that you have!
There you are! You now have your own granny square tote bag!
If you liked this super quick pattern and tutorial, make sure you subscribe to our monthly newsletter so that you never miss out on a new, free crochet pattern, and don't forget to drop a comment below if you have any questions!
And if you create anything using one of my patterns and share it online, I'd love to see it! Make sure you tag us!


so cute!