


Crochet a Hair Ribbon: a Super Quick Crochet Project!

Jump to:
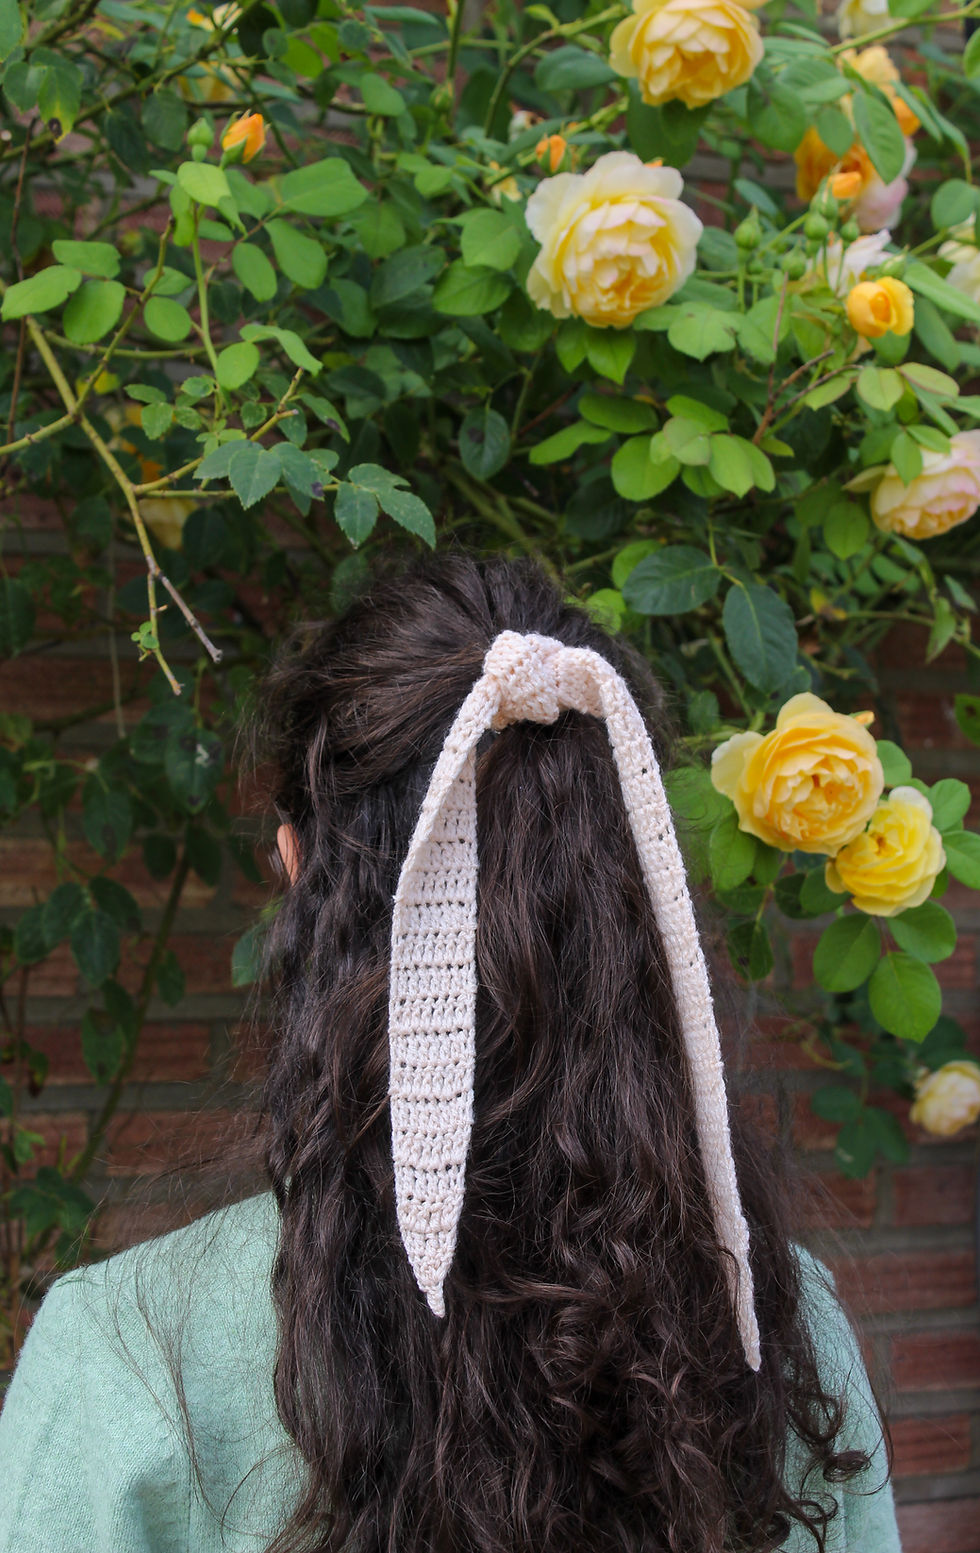
If you're like me and you have no idea what to crochet, I think I have something for you! This crochet hair ribbon is such a fun and quick project and is just the thing to make when you're feeling a bit stuck, creatively speaking!
Now, when I was designing this ribbon, I noticed something: the chain 3 and turn method that is normally used at the end of a row left me with very wonky edges and these great big gaps that looked just awful! So, I thought I'd use a little technique called the stacked single crochet to fix it. By including it in this pattern, you'll not only learn how to create this stitch, but also how to increase and decrease with it. Hopefully, you'll then be able to take this technique and use it in your other projects!
And last but not least, if you are more of a visual learner, I have a video tutorial on our YouTube channel. I've also linked it down below!
I hope you all like this pattern. So, without further ado, let's get into it!

What Yarn Should I Use?
I recommend a lightweight yarn. Whatever you do, you don't want to be using something that's too chunky. I'm going to be using Aldi's So Crafty Double Knit Yarn in cream. And, as this is a spring/summer accessory, I also recommend using a natural fibre, like cotton. However, you really can use whatever you have lying around!
What Hook Should I Use?
The key with this pattern is to size your hook up by 0.5/1mm. My yarn recommends a 4mm hook, so I'm using a 4.5mm. Sizing up will help to create that lovely drape that we're looking for. Have a look at the recommended hook size for your yarn, and then size up a little. (If you're not sure what hook is recommended for your yarn, check out this video!)
What You'll Need:
a lightweight yarn of your choice (see notes above)
a 4.5mm hook (see notes above)
a pair of scissors
a darning needle
a hair band (optional)
Stitch Abbreviations:
ch(s): chain(s)
sc: single crochet
dc: double crochet
dc dec: double crochet decrease (see notes on how to do this)
Pattern Notes:
This pattern is worked in US crochet terms, not UK. If you are unsure about the difference between these two terms, check out my blog post here, where I explain it in detail.
To create straight edges, we'll be using the stacked single crochet technique. If you find it easier, you can use the regular 'chain 3 and turn' method instead.
The stacked single crochet at the beginning of each row counts as 1 double crochet.
This pattern is worked in rows. Make sure you turn your work at the end of each row.
Special Stitches:
The Stacked Single Crochet:
At the end of the row, do not make any turning chains. Just turn your work.

Into the first stitch, make 1sc.

You should then see 2 vertical bars on the sc. Insert your hook under the second of these bars.


Make another sc.

This top single crochet is the top of your stitch. You will work under this part in the next row.
This stacked sc counts as your first stitch and one dc.

Stacked Single Crochet Decrease:
At the end of the row, do not make any turning chains. Just turn your work.
Into the first stitch, make 1sc.
You should then see 2 vertical bars on the sc. Insert your hook under the second of these bars.
Yarn over and pull up a loop (you'll have 2 loops on your hook).

Now, yarn over and insert your hook into the next stitch.
Yarn over and pull up a loop (you'll have 4 loops on your hook).

Yarn over and pull through the first 2 loops (you'll have 3 loops on your hook).

Yarn over and pull through all 3 loops.

Regular Double Crochet Decrease:
Yarn over, insert your hook into the stitch, yarn over and pull up a loop (3 loops on your hook).
Yarn over and pull through the first 2 loops (2 loops on your hook).

Yarn over and insert your hook into the next stitch.
Yarn over and pull up a loop (4 loops on your hook).

Yarn over and pull through the first 2 loops (3 loops on your hook).

Yarn over and pull through all 3 loops.

Crochet Hair Ribbon Pattern:
Row 1:
Make a slip knot and ch 4.
Make 1dc into the 1st ch.
Do not make any turning chs.
Row 2:
Turn your work. Into the 1st stitch, make 1 stacked sc (see above on how to do this).
Make 1dc into the same stitch.
Make 2dc into the next stitch. You'll be working into the top ch. (4dc in total)

Row 3:
Turn your work. Into the 1st stitch, make 1 stacked sc.
Make 1dc into the same stitch.
Make 1dc into the next 2 stitches.
Make 2dc into the last stitch. (6dc in total)

Row 4:
Turn your work. Into the 1st stitch, make 1 stacked sc.
Make 1dc into the same stitch.
Make 1dc into the next 4 stitches.
Make 2dc into the last stitch. (8dc in total)

Row 5:
Now that we've finished tapering our ribbon out, we can crochet the main part.
Turn your work. Into the 1st stitch, make 1 stacked sc.
Make 1dc into the next 7 stitches. (8dc in total)


Row 6-60:
Repeat row 5 until you reach row 60 or your desired length (you can make your ribbon as long as you'd like!).
You should not have more than 8 stitches for each row.

Row 61:


Row 62:
Turn your work. Begin by making a stacked sc dec.
Make 1dc into the next 2 stitches.
Into the last 2 stitches, make a dc dec. (4dc in total)

Row 63:
Turn your work. Begin by making a stacked sc dec.
You should have just 2 stitches left. Make a dc dec into these. (2dc in total)

Row 63:
Turn your work. You should have just 2 stitches. Into these, make a stacked sc dec.
Ch 1 to fasten off, cut your yarn and sew in any tail ends using your darning needle.
And, if you want, you can tie your ribbon to a hair band (but this is optional!)

And there you are! You now have your very own crochet hair ribbon! If you liked this super quick pattern and tutorial, make sure you subscribe to our monthly newsletter so that you never miss out on a new, free crochet pattern, and don't forget to drop a comment below if you have any questions!
And if you create anything using one of my patterns and share it online, I'd love to see it! Make sure you tag us!


Comments