
Crochet Lace Scrunchies: a Free and Simple Crochet Pattern
- Alyssa
- Aug 10, 2025
- 4 min read
Updated: Feb 1

So, I know these have been fashionable for a while, but I thought I would finally jump on the bandwagon and create a written pattern and video tutorial for these gorgeous crochet lace scrunchies!
This might not be of interest to any of you, but I found my inspiration for these scrunchies through two things: first, through sewn ruffles (shock horror!). I just adore how beautiful ruffles are, and I wanted to recreate that look! And secondly, through lace. The body of these scrunchies has a slight lace pattern to them, which I just love!
These scrunchies are more of a decorative hair accessory - I think they look stunning around a bun! However, they can, of course, be used for the conventional use of simply tying one's hair up! They are, after all, just glorified hairbands!
And now, enough of my yapping! Let's get into the pattern and tutorial!

My Yarn Recommendations:
Now, I would recommend using a lightweight (aka, thinner) yarn for these scrunchies. If you have some cotton yarn, I find this works beautifully. You can, of course, use a thicker or chunkier yarn; just remember, this will create a larger and bulkier scrunchie! I find that using a thinner yarn helps define the stitches and keeps with the look of delicate, lacy ruffles.
Crochet Hook to Use:
Choosing the right crochet hook depends entirely on the type of yarn you use. Whichever hook your yarn requires, size up by 1. Now, let me explain that: I used a lightweight yarn for the scrunchies you see in the top photo here. The label recommended I use a 3mm crochet hook. I sized up by 1 and used a 4mm hook. By sizing up hooks, this will help to create slightly looser stitches and will stop our scrunchies from becoming too stiff. Have a play around, and see what works for you best. You might decide that you want to use an even bigger hook, which will also work!
What You'll Need:
a yarn of your choice (see the notes here on choosing the best yarn).
a crochet hook (see the notes here on finding the correct hook for you).
a hair band
a pair of scissors
darning needle
Abbreviations:
hdc: half double crochet
dc: double crochet
sl st: slip stitch
Notes:
This pattern is written in US crochet terms, not UK. If you are unsure about the difference between these two terms, check out my blog post here where I explain it in detail.
The chain 1 and chain 2 at the beginning of each round does not count as a stitch.
Do not turn your work at the end of each round.
Round 1:
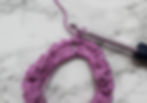
Begin by taking your yarn and attaching it to your hairband. I like to do this by creating a slip knot, and then chaining 1 around my hairband to secure it in place (see photos below).


From here, chain 1.
Then, working around your hairband, make: 1hdc, chain 1.
Repeat this above step around until you have covered your entire hairband. You can crochet as many or as few hdc as you would like. The more you crochet, the more ruffles you will create; the fewer you crochet, the fewer ruffles you will make. It is completely up to you. You will finish with a chain 1.


At the end, sl st into the first hdc to close the round.

Round 2:
To begin round 2, sl st into the first chain 1 space. Then chain 1.
Working into the same chain 1 space, make: 1hdc, chain 1, 1hdc.
Repeat this above step, working around into each chain 1 space.


At the end of the round, sl st into the first hdc to close the round.

Round 3:
To begin round 3, sl st into the first chain 1 space. Then chain 2.

Working into the same space, make: 1dc, chain 1, 1dc.
Repeat this above step, working around into each chain 1 space.


At the end of the round, sl st into the first dc to close the round.

Round 4:
To begin round 4, sl st into the first chain 1 space. Then chain 2.
Starting in the same chain 1 space, make: 2dc, chain 2. Then sl st back into the first of those 2 chains (this will create a tiny "point"). Finally, make 2 more dc into the same space.

Repeat this above step around into each chain 1 space.

At the end of the round, sl st into the first dc to close the round.
Finally, chain 1 to fasten off, cut your yarn, and weave in any loose threads with your darning needle.
And there you are! You now have your own crochet scrunchie! If you liked this super quick pattern and tutorial, make sure you subscribe to our monthly newsletter so that you never miss out on a new, free crochet pattern, and don't forget to drop a comment below if you have any questions!
And if you create anything using one of my patterns and share it online, I'd love to see it! Make sure you tag us!
